Riding Mode: Difference between revisions
Jump to navigation
Jump to search
Unlocked with
| (10 intermediate revisions by 3 users not shown) | |||
| Line 38: | Line 38: | ||
|[[File:DoruGreymon Icon.png]] [[DoruGreymon]]||Ultimate||{{riderwing}} × 1 or {{modeselector}} × 1 | |[[File:DoruGreymon Icon.png]] [[DoruGreymon]]||Ultimate||{{riderwing}} × 1 or {{modeselector}} × 1 | ||
|- | |- | ||
|[[File:Raidramon Icon.png]] [[Raidramon]]|| | |[[File:Raidramon Icon.png]] [[Raidramon]]||Capsule||{{modeselector}} × 3 | ||
|- | |- | ||
|[[File:Pegasusmon Icon.png]] [[Pegasusmon]]|| | |[[File:Pegasusmon Icon.png]] [[Pegasusmon]]||Capsule||{{modeselector}} × 3 | ||
|- | |- | ||
|[[File:Nefertimon Icon.png]] [[Nefertimon]]|| | |[[File:Nefertimon Icon.png]] [[Nefertimon]]||Capsule||{{modeselector}} × 3 | ||
|- | |- | ||
|[[File:Halsemon Icon.png]] [[Halsemon]]|| | |[[File:Halsemon Icon.png]] [[Halsemon]]||Capsule||{{modeselector}} × 3 | ||
|- | |- | ||
|[[File:DinoTigermon Icon.png]] [[DinoTigermon]]||Mega||{{modeselector}} × 2 | |[[File:DinoTigermon Icon.png]] [[DinoTigermon]]||Mega||{{modeselector}} × 2 | ||
| Line 81: | Line 81: | ||
|- | |- | ||
|[[File:Gulfmon Icon.png]] [[Gulfmon]]||Mega||{{modeselector}} × 5 | |[[File:Gulfmon Icon.png]] [[Gulfmon]]||Mega||{{modeselector}} × 5 | ||
|- | |||
|[[File:UlforceVeedramon_Icon.png|link=UlforceVeedramon]] [[UlforceVeedramon]]||Mega||{{modeselector}} × 5 | |||
|- | |- | ||
|[[File:VictoryGreymon Icon.png]] [[VictoryGreymon]]||Side Mega||{{modeselector}} × 5 | |[[File:VictoryGreymon Icon.png]] [[VictoryGreymon]]||Side Mega||{{modeselector}} × 5 | ||
| Line 97: | Line 99: | ||
|- | |- | ||
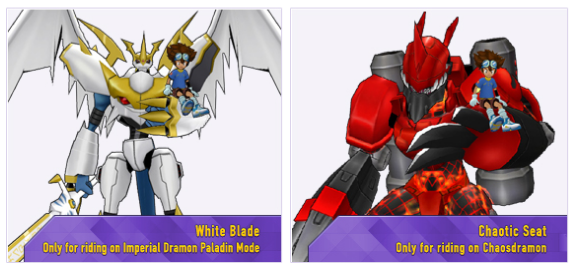
|[[File:Imperialdramon (Paladin Mode)(Jogress) Icon.png|link=Imperialdramon (Paladin Mode)(Jogress)]] [[Imperialdramon (Paladin Mode)(Jogress)]]||Jogress||{{modeselector}} × 7 | |[[File:Imperialdramon (Paladin Mode)(Jogress) Icon.png|link=Imperialdramon (Paladin Mode)(Jogress)]] [[Imperialdramon (Paladin Mode)(Jogress)]]||Jogress||{{modeselector}} × 7 | ||
|} | |} | ||
| Line 108: | Line 111: | ||
|[[File:Gallantmon Icon.png]] [[Gallantmon]]||Mega||[[File:Grani.png]] Grani | |[[File:Gallantmon Icon.png]] [[Gallantmon]]||Mega||[[File:Grani.png]] Grani | ||
|- | |- | ||
|[[File:Zhuqiaomon_(Mega)_Icon.png]] [[Zhuqiaomon (Mega)]]||Mega||[[File:Zhuqiaomon Saddle.png]] Will of Flames | |[[File:Zhuqiaomon_(Mega)_Icon.png]] [[Zhuqiaomon (Mega)]]||Mega||[[File:Zhuqiaomon Saddle.png]] Will of Flames | ||
|- | |- | ||
|[[File:Ebonwumon_(Mega)_Icon.png]] [[Xuanwumon (Mega)]]||Mega||[[File:Ebonwumon Saddle.png]] Xuanwumon Saddle | |[[File:Ebonwumon_(Mega)_Icon.png]] [[Xuanwumon (Mega)]]||Mega||[[File:Ebonwumon Saddle.png]] Xuanwumon Saddle | ||
| Line 114: | Line 117: | ||
|[[File:Baihumon_(Mega)_Icon.png]] [[Baihumon (Mega)]]||Mega||[[File:Baihumon Saddle.png]] Baihumon Saddle | |[[File:Baihumon_(Mega)_Icon.png]] [[Baihumon (Mega)]]||Mega||[[File:Baihumon Saddle.png]] Baihumon Saddle | ||
|- | |- | ||
|[[File:Azulongmon_(Mega)_Icon.png]] [[Azulongmon (Mega)]]||Mega||[[File:Azulongmon Saddle.png]] | |[[File:Azulongmon_(Mega)_Icon.png]] [[Azulongmon (Mega)]]||Mega||[[File:Azulongmon Saddle.png]] Qinglongmon Saddle | ||
|- | |- | ||
|[[File:Chaosdramon Icon.png]] [[Chaosdramon]]||Burst Mode||[[File:Chaotic Sheet.png]] Chaotic Seat | |[[File:Chaosdramon Icon.png]] [[Chaosdramon]]||Burst Mode||[[File:Chaotic Sheet.png]] Chaotic Seat | ||
| Line 146: | Line 149: | ||
|[[File:Alphamon_Ouryuken_Icon.png]] [[Alphamon Ouryuken]] ||Jogress||[[File:Alphamon Ouryuken Ride.png]] Code in Alpha | |[[File:Alphamon_Ouryuken_Icon.png]] [[Alphamon Ouryuken]] ||Jogress||[[File:Alphamon Ouryuken Ride.png]] Code in Alpha | ||
|- | |- | ||
|[[File:Armageddemon_Icon.png]] [[Armageddemon ( | |[[File:Susanoomon_Icon.png]] [[Susanoomon]] ||Jogress||[[File:Susanoomon Ride.png]] Susanoo Craft | ||
|- | |||
|[[File: Millenniummon Icon.png]] [[Millenniummon]] ||Jogress||[[File:Millenniummon Ride.png]] Dimension Gear | |||
|- | |||
|[[File:Magnamon_Icon.png]] [[Magnamon]] ||Capsule||[[File:Miracle of Magnum.png]] Miracle of Magnum | |||
|- | |||
|[[File:Armageddemon_Icon.png]] [[Armageddemon (Conflation)]] ||Variant||[[File:Armageddemon_(Mixture)_Ride.png]] Path to Devastator | |||
|- | |||
|[[File:Apocalymon_(Psychic)_Icon.png]] [[Apocalymon (Psychic)]] ||Variant||[[File:Apocalymon_Psychic_Ride.png]] Call of Doom | |||
|} | |} | ||
Revision as of 01:33, 2 May 2019

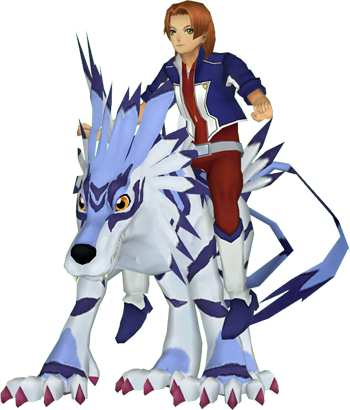
Marcus Damon riding Garurumon
Riding Mode allows players to ride certain digimons, and move faster than normal. Riding a Rookie, Champion or Ultimate digimon evolution makes traveling faster than regular walking, but riding a Armor, Mega, Side Mega, Burst Mode or Jogress digimon evolution speeds it up even more and allows passing through Leader/Chief/Boss Digimon without being attacked.
Some digimons have their own special Riding Mode item, which are slightly faster than the item Riderwing or ModeSelector provides for other Digimon.
The following digimons are able to be ridden:
Unlocked with  Riderwing or
  Mode Selector
| Digimon | Form | Unlocked with |
|---|---|---|
| Rookie | ||
| Champion | ||
| Champion | ||
| Champion | ||
| Champion | ||
| Champion | ||
| Champion | ||
| Champion | ||
| Champion | ||
| Champion | ||
| Champion | ||
| Ultimate | ||
| Ultimate | ||
| Capsule | ||
| Capsule | ||
| Capsule | ||
| Capsule | ||
| Mega | ||
| Mega | ||
| Mega | ||
| Mega | ||
| Mega | ||
| Mega | ||
| Mega | ||
| Mega | ||
| Mega | ||
| Mega | ||
| Mega | ||
| Mega | ||
| Mega | ||
| Mega | ||
| Mega | ||
| Mega | ||
| Mega | ||
| Mega | ||
| Mega | ||
| Side Mega | ||
| Side Mega | ||
| Burst Mode | ||
| Burst Mode | ||
| Burst Mode | ||
| Burst Mode | ||
| Jogress | ||
| Jogress |
Unlocked with One Special Item
| Digimon | Form | Unlocked with |
|---|---|---|
| Mega | ||
| Mega | ||
| Mega | ||
| Mega | ||
| Mega | ||
| Mega | ||
| Burst Mode | ||
| Burst Mode | ||
| Burst Mode | ||
| Burst Mode | ||
| Burst Mode | ||
| Burst Mode | ||
| Burst Mode | ||
| Burst Mode | ||
| Burst Mode | ||
| Burst Mode | ||
| Jogress | ||
| Jogress | ||
| Jogress | ||
| Jogress | ||
| Jogress | ||
| Jogress |  Susanoo Craft Susanoo Craft
| |
| Jogress | File:Millenniummon Ride.png Dimension Gear | |
| Capsule | ||
| Variant | ||
| Variant |
Gallery


- List of available Mercenary Digimon
- List of available Mercenary Digimon(Pictures)
- 傭兵數碼精靈
- Area of Effect Skills
- Armor Digivolution
- Burst Mode
- Data Exchange
- DigiClone
- Digimon Auras
- Digimon Sizes
- Hatching
- Jogress
- Memory Skills
- Riding Mode
- Rank System
- Skill DigiCode
- Spirit System
- Transcendence System
- Variant
- X-Antibody System
- Xros System