Boundaries of Yin and Yang: Difference between revisions

From Digimon Masters Online Wiki - DMO Wiki
Jump to navigation Jump to search
No edit summary
No edit summary
Line 1: Line 1:
'''The area where Fanglongmon and the Four Holy Beasts exists.'''


*[[File:Pass Fanglongmon Dungeon.png|link=]] '''Pass [Fanglongmon Dungeon]''' and Tamer level 90+ is required to enter the dungeon. The pass can be obtained for free from a daily quest given by Guilmon in [[D-Terminal]], or by trading 100x [[File:Yin and Yang Spirit.png|link=]] '''Yin and Yang Spirit''' with Renamon.
*Boundaries of Yin and Yang / Fanglongmon Dungeon is available for tamer lv90+
*[[File:Pass Fanglongmon Dungeon.png|link=]] '''Pass [Fanglongmon Dungeon]''' is required to enter the Dungeon.
*Talk to NPC Guilmon in [[D-Terminal]] to receive Quest (Daily) that obtain 2 [[File:Pass Fanglongmon Dungeon.png|link=]] '''Pass [Fanglongmon Dungeon]'''.
*Talk to NPC Renamon in [[D-Terminal]] by trading 100x [[File:Yin and Yang Spirit.png|link=]] '''Yin and Yang Spirit''' for 1 [[File:Pass Fanglongmon Dungeon.png|link=]] '''Pass [Fanglongmon Dungeon]'''.
*[[File:Yin and Yang Spirit.png|link=]]Yin and Yang Spirit can be dropped from any Digimon in [[Versandi Terminal]]
*This dungeon is separated into 2 rooms.
*Talk to NPC Guilmon in [[D-Terminal]] to enter the dungeon.
*Boundaries of Yin and Yang is separated into 2 rooms.


==Fanglongmon Dungeon==


Upon entering, you will be in this room which is further separated into 4 different zones. There are 4 raid bosses in this room: [[Xuanwumon (Raid)|Xuanwumon]] [[Zhuqiaomon (Raid)|Zhuqiaomon]] [[Baihumon (Raid)|Baihumon]] and [[Qinglongmon (Raid)|Qinglongmon]]. All of them function the same way as the other version in their respective dungeons, however they have more HP and deal more damage.


All of the bosses also have 3 different mini bosses. These mini bosses do not use skill, however they will be giving you debuffs which reduce your attack and skill damage. They will also be respawning after a certain period of time after being defeated.


The first raid boss you have to fight is [[Xuanwumon (Raid)|Xuanwumon]].
=Fanglongmon Dungeon=
 
<div class="mh"><imagemap>
File:Descending Thunder God.png|right
</imagemap></div>
 
*Upon entering the dungeon, the room is separated by 4 different zones, which similar to [[Descending Thunder God]] Dungeon.
*There will be 4 raids in this room:[[Xuanwumon (The Ruler of the North)|Xuanwumon]] [[Zhuqiaomon (The Ruler of the South)|Zhuqiaomon]] [[Baihumon (The Ruler of the West)|Baihumon]] and [[Qinglongmon (The Ruler of the East)|Qinglongmon]]
*The Raids function the same way as the other version in their respective dungeons, however they have more HP and deal more damage.
*The first raid boss to fight is [[Xuanwumon (The Ruler of the North)|Xuanwumon]].
*When [[Xuanwumon (The Ruler of the North)|Xuanwumon]] is defeated, there is a choice to go between [[Zhuqiaomon (The Ruler of the South)|Zhuqiaomon]] zone and [[Baihumon (The Ruler of the West)|Baihumon]] zone.
*Talk to NPC Guilmon to enter the zone to fight [[Zhuqiaomon (The Ruler of the South)|Zhuqiaomon]].
*Talk to NPC Renamon to enter the zone to fight [[Baihumon (The Ruler of the West)|Baihumon]].
*Both Raids must be defeated to unlock the portal to enter the final zone.
*Final boss on this room will be [[Qinglongmon (The Ruler of the East)|Qinglongmon]].
*Defeat [[Qinglongmon (The Ruler of the East)|Qinglongmon]] and proceed to the second room.
*'''[[File:Battle Tag.png|link=]]Battle Tag''' is disable in this room.


==NPC's==
{| cellspacing=''3''
|[[File:Renamon Icon.png]]
|[[Renamon]]
|<Western Boundary>
|-
|[[File:Guilmon Icon.png]]
|[[Guilmon]]
|<Southern Boundary>
|-
|}


==Wild Digimon==


{{Wild
{{Wild
Line 19: Line 54:
|element=Water
|element=Water
|levels=99
|levels=99
|hp=~17,000,000
|hp=17,000,000
}}
}}
After [[Xuanwumon (Raid)|Xuanwumon]], there is a choice to go between [[Zhuqiaomon (Raid)|Zhuqiaomon]] zone and [[Baihumon (Raid)|Baihumon]] zone. You will have to defeat both of them, so the order does not matter in this case.


{{Wild
{{Wild
Line 31: Line 63:
|element=Fire
|element=Fire
|levels=99
|levels=99
|hp=~11,000,000
|hp=11,000,000
}}
}}


Line 40: Line 72:
|element=Steel
|element=Steel
|levels=99
|levels=99
|hp=~11,000,000
|hp=11,000,000
}}
}}
After both of them are defeated, you will have to fight [[Qinglongmon (Raid)|Qinglongmon]] before proceeding to the second room.


{{Wild
{{Wild
Line 52: Line 81:
|element=Thunder
|element=Thunder
|levels=99
|levels=99
|hp=~26,500,000
|hp=26,500,000
}}
}}


==Fanglongmon Dungeon Underground==


{{notesmall|You will not be transported out of the dungeon if you die in this room.}}
 
==Raids==
 
[[File:Ebonwumon (Mega) Icon.png|link=Xuanwumon (The Ruler of the North)]]
[[Xuanwumon (The Ruler of the North)]]
 
[[File:Zhuqiaomon (Mega) Icon.png|link=Zhuqiaomon (The Ruler of the South)]]
[[Zhuqiaomon (The Ruler of the South)]]
 
[[File:Baihumon (Mega) Icon.png|link=Baihumon (The Ruler of the West)]]
[[Baihumon (The Ruler of the West)]]
 
[[File:QingLongmon Icon.png|link=Qinglongmon (The Ruler of the East)]]
[[Qinglongmon (The Ruler of the East)]]


==Loading Screen==
<gallery heights="300px" widths="300px">
File:Descending Thunder God1.png
</gallery>
 
{{map}}


=Fanglongmon Dungeon Underground=
 
<div class="mh"><imagemap>
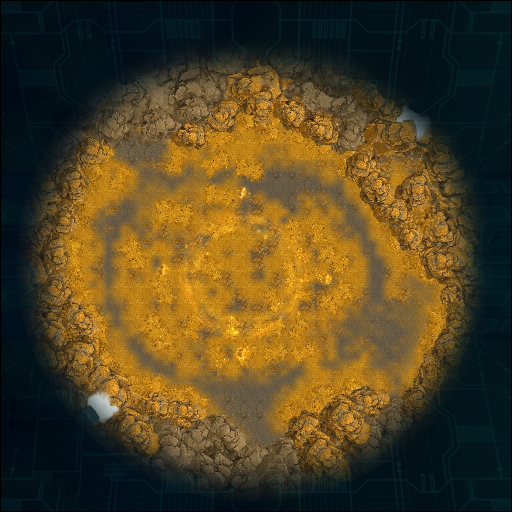
File:Boundaries of Yin and Yang1.png|right
</imagemap></div>
 
*Once enter the second room, Player is unable to return to the previous room.
*Player will not be teleported out of the map if dies in this room.
*Party member that disconnect can't enter the second room directly, the raid from the first room will respawn and need to defeat again to enter the second room again. Thus best to avoid disconnection in second room.
*Fanglonmon has 10 minutes time limit to defeat, every party member will be killed by its One hit KO skill when reached the time limit regardless of Player's Digimon HP.
*'''[[File:Battle Tag.png|link=]]Battle Tag''' is disable in this room.
 
 
==Wild Digimon==


{{Wild
{{Wild
|type=aggressive
|type=aggressive
|name=Fanglongmon
|name=Fanglongmon (Raid)
|attr=Data
|attr=Data
|element=Land
|element=Land
Line 68: Line 136:
}}
}}


*This raid boss has about 90 000 000 HP
*The raid boss has a total of 4 different skill.
*The first skill called "Watch and learn from the true ruler." (can be dodged), a ground target circle that deals 4,500 damage with [[4th-Degree Burn Debuff]]. Fanglongmon will use this skill 6 times consecutively to a random player that hit Fanglongmon.
*The second skill called "A mere weak existence!" (cannot be dodged), a big target circle that deals 12,000 damage to 2 random players, the damage will be multiplied by the number of player overlap the circle (2 player deal 24,000 damage, 3 player deal 36.000 damage, 4 player deal 48,000 damage). Fanglongmon will always use this skill after the first skill is complete.
*The third skill called "Go back to where you came from!" (cannot be dodge), a small target circle that deals 80,000 damage to 1 random player, the damage is divided by the number of players inside the circle ( 2 player deal 40,000 damage, 3 p[ayer deal 26666 damage, 4 player deal 20,000 damage). Fanglongmon will start using this skill when HP below 70%.
*The fourth skill called "Do you dare to stand against hundreds of disasters at once?" (can be dodged), several target circle will appear on the ground that deals 38,000 damage with [[Silence Debuff]] to the player that inside the circle. Fanglongmon will start using this skill when HP below 50%
*Fanglongmon will NEVER stop using all its skill until it dies.
*This raid has 10 minutes time limit after being attacked. Fanglongmon will use its One hit KO skill when reached the time limit.


==Drop==
===[[File:Yin and Yang Box icon.png]] Yin and Yang Box (Xuanwumon)===
{|
||| [[File:Evoluter.png]] ||Evoluter
|-
|8x|| [[File:Fruit of the Goddess.png]] ||Fruit of Goddess
|-
|10x|| [[File:Miracle Fruit.png]] ||Miracle Fruit
|-
||| [[File:Attribute Booster.png]] ||Attribute EXP Booster [15days]
|-
||| [[File:PSilk Jump Booster.png]] ||Jump Booster [All Area]
|-
|2x|| [[File:Amazing Renewal Increase Stone.png]] ||Amazing Renewal Increase Stone
|-
|2x|| [[File:Amazing Digitary Power Stone.png]] ||Amazing Digitary Power Stone
|-
|10x|| [[File:Fanglongmon's Life.png]] ||Fanglongmon's Life
|-
|10x|| [[File:Fanglongmon's Digisoul.png]] ||Fanglongmon's Digisoul
|-
||| [[File:Fanglongmon's Energy.png]] ||Fanglongmon's Energy
|-
||| [[File:Mercy of the Gold Dragon AT.png]] ||Mercy of the Gold Dragon [AT] +50%
|-
||| [[File:Mercy of the Gold Dragon HP.png]] ||Mercy of the Gold Dragon [Max HP] +50%
|-
||| [[File:Mercy of the Gold Dragon DS.png]] ||Mercy of the Gold Dragon [Max DS] +50%
|-
||| [[File:Mercy of the Gold Dragon DE.png]] ||Mercy of the Gold Dragon [DE] +50%
|-
||| [[File:Mercy of the Gold Dragon EXP.png]] ||Mercy of the Gold Dragon [EXP] +1000%
|-
||| [[File:Rage of the Gold Dragon SK.png]] ||Rage of the Gold Dragon [Skill Damage] +100%
|-
||| [[File:Rage of the Gold Dragon CD.png]] || Rage of the Gold Dragon [Critical Damage] +100%
|-
||| [[File:Rage of the Gold Dragon MS.png]] || Rage of the Gold Dragon [Movement Speed] +35%
|-
||| [[File:Chipset Box.png]] ||Chipset Box [HP] R8
|-
||| [[File:Chipset Box.png]] ||Chipset Box [DE] R8
|-
||| [[File:Fanronkou .png]] || Fanronkou
|-
|}
===[[File:Yin and Yang Box icon.png]] Yin and Yang Box (Zhuqiaomon)===
{|
|5x|| [[File:Evoluter.png]] ||Evoluter
|-
|8x|| [[File:Fruit of the Goddess.png]] ||Fruit of Goddess
|-
|10x|| [[File:Miracle Fruit.png]] ||Miracle Fruit
|-
||| [[File:Attribute Booster.png]] ||Attribute EXP Booster [15days]
|-
|8x|| [[File:PSilk Jump Booster.png]] ||Jump Booster [All Area]
|-
|3x|| [[File:Amazing Renewal Increase Stone.png]] ||Amazing Renewal Increase Stone
|-
|3x|| [[File:Amazing Digitary Power Stone.png]] ||Amazing Digitary Power Stone
|-
|15x|| [[File:Fanglongmon's Life.png]] ||Fanglongmon's Life
|-
|15x|| [[File:Fanglongmon's Digisoul.png]] ||Fanglongmon's Digisoul
|-
|2x|| [[File:Fanglongmon's Energy.png]] ||Fanglongmon's Energy
|-
|2x|| [[File:Mercy of the Gold Dragon AT.png]] ||Mercy of the Gold Dragon [AT] +50%
|-
|2x|| [[File:Mercy of the Gold Dragon HP.png]] ||Mercy of the Gold Dragon [Max HP] +50%
|-
|2x|| [[File:Mercy of the Gold Dragon DS.png]] ||Mercy of the Gold Dragon [Max DS] +50%
|-
|2x|| [[File:Mercy of the Gold Dragon DE.png]] ||Mercy of the Gold Dragon [DE] +50%
|-
|2x|| [[File:Mercy of the Gold Dragon EXP.png]] ||Mercy of the Gold Dragon [EXP] +1000%
|-
|2x|| [[File:Rage of the Gold Dragon SK.png]] ||Rage of the Gold Dragon [Skill Damage] +100%
|-
|2x|| [[File:Rage of the Gold Dragon CD.png]] || Rage of the Gold Dragon [Critical Damage] +100%
|-
|2x|| [[File:Rage of the Gold Dragon MS.png]] || Rage of the Gold Dragon [Movement Speed] +35%
|-
||| [[File:Chipset Box.png]] ||Chipset Box [DS] R8
|-
||| [[File:Chipset Box.png]] ||Chipset Box [HT] R8
|-
||| [[File:Fanronkou .png]] || Fanronkou
|-
|}


===[[File:Yin and Yang Box icon.png]] Yin and Yang Box (Baihumon)===
==Raids==
{|
|5x|| [[File:Evoluter.png]] ||Evoluter
|-
|8x|| [[File:Fruit of the Goddess.png]] ||Fruit of Goddess
|-
|10x|| [[File:Miracle Fruit.png]] ||Miracle Fruit
|-
||| [[File:Attribute Booster.png]] ||Attribute EXP Booster [15days]
|-
|8x|| [[File:PSilk Jump Booster.png]] ||Jump Booster [All Area]
|-
|3x|| [[File:Amazing Renewal Increase Stone.png]] ||Amazing Renewal Increase Stone
|-
|3x|| [[File:Amazing Digitary Power Stone.png]] ||Amazing Digitary Power Stone
|-
|15x|| [[File:Fanglongmon's Life.png]] ||Fanglongmon's Life
|-
|15x|| [[File:Fanglongmon's Digisoul.png]] ||Fanglongmon's Digisoul
|-
|2x|| [[File:Fanglongmon's Energy.png]] ||Fanglongmon's Energy
|-
|2x|| [[File:Mercy of the Gold Dragon AT.png]] ||Mercy of the Gold Dragon [AT] +50%
|-
|2x|| [[File:Mercy of the Gold Dragon HP.png]] ||Mercy of the Gold Dragon [Max HP] +50%
|-
|2x|| [[File:Mercy of the Gold Dragon DS.png]] ||Mercy of the Gold Dragon [Max DS] +50%
|-
|2x|| [[File:Mercy of the Gold Dragon DE.png]] ||Mercy of the Gold Dragon [DE] +50%
|-
|2x|| [[File:Mercy of the Gold Dragon EXP.png]] ||Mercy of the Gold Dragon [EXP] +1000%
|-
|2x|| [[File:Rage of the Gold Dragon SK.png]] ||Rage of the Gold Dragon [Skill Damage] +100%
|-
|2x|| [[File:Rage of the Gold Dragon CD.png]] || Rage of the Gold Dragon [Critical Damage] +100%
|-
|2x|| [[File:Rage of the Gold Dragon MS.png]] || Rage of the Gold Dragon [Movement Speed] +35%
|-
||| [[File:Chipset Box.png]] ||Chipset Box [AT] R8
|-
||| [[File:Chipset Box.png]] ||Chipset Box [EV] R8
|-
||| [[File:Fanronkou .png]] || Fanronkou
|-
|}


===[[File:Yin and Yang Box icon.png]] Yin and Yang Box (Qinglongmon)===
[[File:Fanglongmon Icon.png|link=Fanglongmon (Raid)]]
{|
[[Fanglongmon (Raid)]]
|8x|| [[File:Evoluter.png]] ||Evoluter
|-
|10x|| [[File:Fruit of the Goddess.png]] ||Fruit of Goddess
|-
|12x|| [[File:Miracle Fruit.png]] ||Miracle Fruit
|-
|2x|| [[File:Attribute Booster.png]] ||Attribute EXP Booster [15days]
|-
|10x|| [[File:PSilk Jump Booster.png]] ||Jump Booster [All Area]
|-
|4x|| [[File:Amazing Renewal Increase Stone.png]] ||Amazing Renewal Increase Stone
|-
|4x|| [[File:Amazing Digitary Power Stone.png]] ||Amazing Digitary Power Stone
|-
|20x|| [[File:Fanglongmon's Life.png]] ||Fanglongmon's Life
|-
|20x|| [[File:Fanglongmon's Digisoul.png]] ||Fanglongmon's Digisoul
|-
|2x|| [[File:Fanglongmon's Energy.png]] ||Fanglongmon's Energy
|-
|2x|| [[File:Mercy of the Gold Dragon AT.png]] ||Mercy of the Gold Dragon [AT] +50%
|-
|2x|| [[File:Mercy of the Gold Dragon HP.png]] ||Mercy of the Gold Dragon [Max HP] +50%
|-
|2x|| [[File:Mercy of the Gold Dragon DS.png]] ||Mercy of the Gold Dragon [Max DS] +50%
|-
|2x|| [[File:Mercy of the Gold Dragon DE.png]] ||Mercy of the Gold Dragon [DE] +50%
|-
|2x|| [[File:Mercy of the Gold Dragon EXP.png]] ||Mercy of the Gold Dragon [EXP] +1000%
|-
|2x|| [[File:Rage of the Gold Dragon SK.png]] ||Rage of the Gold Dragon [Skill Damage] +100%
|-
|2x|| [[File:Rage of the Gold Dragon CD.png]] || Rage of the Gold Dragon [Critical Damage] +100%
|-
|2x|| [[File:Rage of the Gold Dragon MS.png]] || Rage of the Gold Dragon [Movement Speed] +35%
|-
||| [[File:Chipset Box.png]] ||Chipset Box [DE] R8
|-
||| [[File:Chipset Box.png]] ||Chipset Box [CT] R8
|-
||| [[File:Fanronkou .png]] || Fanronkou
|-
|}


===[[File:Yin and Yang Box icon.png]] Yin and Yang Box (Fanglongmon)===
{|
|10x|| [[File:Evoluter.png]] ||Evoluter
|-
|12x|| [[File:Fruit of the Goddess.png]] ||Fruit of Goddess
|-
|15x|| [[File:Miracle Fruit.png]] ||Miracle Fruit
|-
|3x|| [[File:Attribute Booster.png]] ||Attribute EXP Booster [15days]
|-
|15x|| [[File:PSilk Jump Booster.png]] ||Jump Booster [All Area]
|-
|5x|| [[File:Amazing Renewal Increase Stone.png]] ||Amazing Renewal Increase Stone
|-
|5x|| [[File:Amazing Digitary Power Stone.png]] ||Amazing Digitary Power Stone
|-
|20x|| [[File:Fanglongmon's Life.png]] ||Fanglongmon's Life
|-
|20x|| [[File:Fanglongmon's Digisoul.png]] ||Fanglongmon's Digisoul
|-
|3x|| [[File:Fanglongmon's Energy.png]] ||Fanglongmon's Energy
|-
|3x|| [[File:Mercy of the Gold Dragon AT.png]] ||Mercy of the Gold Dragon [AT] +50%
|-
|3x|| [[File:Mercy of the Gold Dragon HP.png]] ||Mercy of the Gold Dragon [Max HP] +50%
|-
|3x|| [[File:Mercy of the Gold Dragon DS.png]] ||Mercy of the Gold Dragon [Max DS] +50%
|-
|3x|| [[File:Mercy of the Gold Dragon DE.png]] ||Mercy of the Gold Dragon [DE] +50%
|-
|3x|| [[File:Mercy of the Gold Dragon EXP.png]] ||Mercy of the Gold Dragon [EXP] +1000%
|-
|3x|| [[File:Rage of the Gold Dragon SK.png]] ||Rage of the Gold Dragon [Skill Damage] +100%
|-
|3x|| [[File:Rage of the Gold Dragon CD.png]] || Rage of the Gold Dragon [Critical Damage] +100%
|-
|3x|| [[File:Rage of the Gold Dragon MS.png]] || Rage of the Gold Dragon [Movement Speed] +35%
|-
||| [[File:Chipset Box.png]] ||Chipset Box [HP] R11
|-
||| [[File:Chipset Box.png]] ||Chipset Box [DS] R11
|-
||| [[File:Chipset Box.png]] ||Chipset Box [AT] R11
|-
||| [[File:Chipset Box.png]] ||Chipset Box [DE] R11
|-
||| [[File:Chipset Box.png]] ||Chipset Box [HT] R11
|-
||| [[File:Chipset Box.png]] ||Chipset Box [EV] R11
|-
||| [[File:Chipset Box.png]] ||Chipset Box [CT] R11
|-
||| [[File:Fanronkou .png]] || Fanronkou
|-
||| [[File:Fanglongmon Ring.png]] ||Fanglongmon's Ancient Ring [Lv.1]
|-
||| [[File:Fanglongmon Necklace.png]] ||Fanglongmon's Ancient Necklace [Lv.1]
|-
||| [[File:Fanglongmon Earring.png]] ||Fanglongmon's Ancient Earring [Lv.1]
|-
||| [[File:Advanced_b-vice.png]] ||Advanced 102-Blue-BT Random Box
|-
|}


Revision as of 09:07, 28 March 2020

The area where Fanglongmon and the Four Holy Beasts exists.

  • Boundaries of Yin and Yang / Fanglongmon Dungeon is available for tamer lv90+
  • Pass Fanglongmon Dungeon.png Pass [Fanglongmon Dungeon] is required to enter the Dungeon.
  • Talk to NPC Guilmon in D-Terminal to receive Quest (Daily) that obtain 2 Pass Fanglongmon Dungeon.png Pass [Fanglongmon Dungeon].
  • Talk to NPC Renamon in D-Terminal by trading 100x Yin and Yang Spirit.png Yin and Yang Spirit for 1 Pass Fanglongmon Dungeon.png Pass [Fanglongmon Dungeon].
  • Yin and Yang Spirit.pngYin and Yang Spirit can be dropped from any Digimon in Versandi Terminal
  • Talk to NPC Guilmon in D-Terminal to enter the dungeon.
  • Boundaries of Yin and Yang is separated into 2 rooms.


Fanglongmon Dungeon

Descending Thunder God.png
About this image
  • Upon entering the dungeon, the room is separated by 4 different zones, which similar to Descending Thunder God Dungeon.
  • There will be 4 raids in this room:Xuanwumon Zhuqiaomon Baihumon and Qinglongmon
  • The Raids function the same way as the other version in their respective dungeons, however they have more HP and deal more damage.
  • The first raid boss to fight is Xuanwumon.
  • When Xuanwumon is defeated, there is a choice to go between Zhuqiaomon zone and Baihumon zone.
  • Talk to NPC Guilmon to enter the zone to fight Zhuqiaomon.
  • Talk to NPC Renamon to enter the zone to fight Baihumon.
  • Both Raids must be defeated to unlock the portal to enter the final zone.
  • Final boss on this room will be Qinglongmon.
  • Defeat Qinglongmon and proceed to the second room.
  • Battle Tag.pngBattle Tag is disable in this room.


NPC's

Renamon Icon.png Renamon <Western Boundary>
Guilmon Icon.png Guilmon <Southern Boundary>


Wild Digimon

Xuanwumon
Xuanwumon Search Icon.png Aggressive monsters attack you first. Vaccine: Strong against Virus - weak against Data Water: is strong against Fire (× 25) - weak against Ice (× -25) - somewhat strong against Water (× 10) HP: 17,000,000 Level(s): 99
Zhuqiaomon
Zhuqiaomon Search Icon.png Aggressive monsters attack you first. Virus: Strong against Data - weak against Vaccine Fire: is strong against Ice (× 25) - weak against Water (× -25) - somewhat strong against Fire (× 10) HP: 11,000,000 Level(s): 99
Baihumon
Baihumon Search Icon.png Aggressive monsters attack you first. Data: Strong against Vaccine - weak against Virus Steel: is strong against Light (× 25) - weak against Thunder (× -25) - somewhat strong against Steel (× 10) HP: 11,000,000 Level(s): 99
Qinglongmon
Qinglongmon Search Icon.png Aggressive monsters attack you first. Data: Strong against Vaccine - weak against Virus Thunder: is strong against Steel (× 25) - weak against Pitch Black (× -25) - somewhat strong against Thunder (× 10) HP: 26,500,000 Level(s): 99


Raids

Ebonwumon (Mega) Icon.png Xuanwumon (The Ruler of the North)

Zhuqiaomon (Mega) Icon.png Zhuqiaomon (The Ruler of the South)

Baihumon (Mega) Icon.png Baihumon (The Ruler of the West)

QingLongmon Icon.png Qinglongmon (The Ruler of the East)


Loading Screen


Fanglongmon Dungeon Underground

Boundaries of Yin and Yang1.png
About this image
  • Once enter the second room, Player is unable to return to the previous room.
  • Player will not be teleported out of the map if dies in this room.
  • Party member that disconnect can't enter the second room directly, the raid from the first room will respawn and need to defeat again to enter the second room again. Thus best to avoid disconnection in second room.
  • Fanglonmon has 10 minutes time limit to defeat, every party member will be killed by its One hit KO skill when reached the time limit regardless of Player's Digimon HP.
  • Battle Tag.pngBattle Tag is disable in this room.


Wild Digimon

Fanglongmon (Raid)
Fanglongmon (Raid) Search Icon.png Aggressive monsters attack you first. Data: Strong against Vaccine - weak against Virus Land: is strong against Wind (× 25) - weak against Wood (× -25) - somewhat strong against Land(× 10) HP: 90,000,000 Level(s): 99


Raids

Fanglongmon Icon.png Fanglongmon (Raid)


Loading Screen